


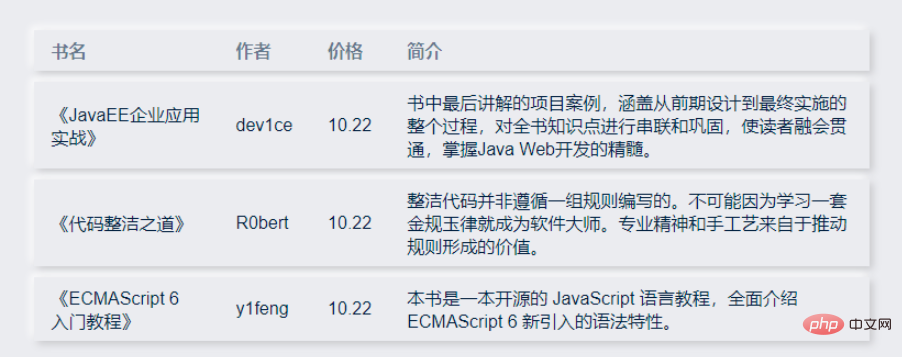
基础表格
首先开发table组件之前,先想好要用什么样式的api,因为笔者在生产工作中用的都是element,所以前面几个组件风格和element类似,但是这次不打算用element的风格了,打算换一种,直接展示:
我们期望用户这样使用:
<script setup>
const dataList = [
  {
    id: 1,
    name: '《JavaEE企业应用实战》',
    author: 'dev1ce',
    price: '10.22',
    desc: '书中最后讲解的项目案例,涵盖从前期设计到最终实施的整个过程,对全书知识点进行串联和巩固,使读者融会贯通,掌握Java Web开发的精髓。'
  },
  {
    id: 2,
    name: '《代码整洁之道》',
    author: 'R0bert',
    price: '10.22',
    desc: '整洁代码并非遵循一组规则编写的。不可能因为学习一套金规玉律就成为软件大师。专业精神和手工艺来自于推动规则形成的价值。'
  },
  {
    id: 3,
    name: '《ECMAScript 6 入门教程》',
    author: 'y1feng',
    price: '10.22',
    desc: '本书是一本开源的 JavaScript 语言教程,全面介绍 ECMAScript 6 新引入的语法特性。'
  },
]
const columnsList = [
  {
    title: '书名',
    key: 'name'
  },
  {
    title: '作者',
    key: 'author'
  },
  {
    title: '价格',
    key: 'price'
  },
  {
    title: '简介',
    key: 'desc'
  }
]
</script>
<template>
    <sanorin-table :columns="columnsList" :data="dataList"/>
</template>
依照这个写出以下代码
<script setup>
  import { ref, computed } from 'vue'
  import { useProp, useNeumorphism } from '../mixin/neumorphism'
  const props = defineProps({
      ...useProp,
      ...{
        data: { // dataList
            type: Array,
            default: () => [],
        },
        columns: { // columnsList
            type: Array,
            default: () => [],
        },
      }
  })
  const { baseStyleObject } = useNeumorphism(props)
  let styleObject =  computed(() => ({
    // '--font-size': `${props.size-26}px`, '--line-height': `${props.size-20}px`, '--limit-size': `${props.size-28}px`
  }))
</script>
<template>
    <div :>
      <table >
        <thead>
          <tr class="neumorphism">
            <!-- 表头循环 -->
            <th v-for="col in columns" :key="col.key">{{col.title}}</th>
          </tr>
        </thead>
        <tbody>
          <!-- 表体循环 -->
          <tr class="neumorphism" v-for="row in data" :key="row.id">
            <td v-for="col in columns" :key="col.key">
              <span>
                {{row[col.key]}}
              </span>
            </td>
          </tr>
        </tbody>
      </table>
    </div>
</template>
<script>
  export default {
    name: 'sanorin-table',
  }
</script>
<style scoped>
  @import "../../style/index.css";
  @import "../../style/neumorphism.css";
  table {
    width: 100%;
    /* border-collapse: collapse; */
    empty-cells: show;
    border-collapse:separate;
    border-spacing:0px 10px;
  }
  table td,
  table th {
    color: var(--text-color);
    padding: 8px 16px 8px 16px;
    text-align: left;
  }
  table th {
    color: var(--text-back-color) !important;
    font-weight: 600;
    white-space: nowrap;
  }
  table tr{
    margin-top: 20px;
  }
</style>
最后出来的效果就是:
然后实现了这个后我们开始做后面的,先从固定表头开始。
立即学习“前端免费学习笔记(深入)”;
固定表头
这里先采用第一种,以后不能满足需求了再改成后面的方法。
效果和代码如下:

<script setup>
  import { ref, computed } from 'vue'
  import { useProp, useNeumorphism } from '../mixin/neumorphism'
  const props = defineProps({
      ...useProp,
      ...{
        data: { // dataList
            type: Array,
            default: () => [],
        },
        columns: { // columnsList
            type: Array,
            default: () => [],
        },
      }
  })
  const { baseStyleObject } = useNeumorphism(props)
  let styleObject =  computed(() => ({
  }))
</script>
<template>
    <div class="san-table scrollbar" :>
      <table>
        <thead>
            <tr class="neumorphism">
              <!-- 表头循环 -->
              <th v-for="col in columns" :key="col.key">{{col.title}}</th>
            </tr>
        </thead>
        <tbody>
          <!-- 表体循环 -->
          <tr class="neumorphism" v-for="row in data" :key="row.id">
            <td v-for="col in columns" :key="col.key">
              <span>
                {{row[col.key]}}
              </span>
            </td>
          </tr>
        </tbody>
      </table>
    </div>
</template>
<script>
  export default {
    name: 'sanorin-table',
  }
</script>
<style scoped>
  @import "../../style/index.css";
  @import "../../style/neumorphism.css";
  .san-table{
    padding: 0px 20px 20px 20px;
    height: 200px;
    position: relative;
    width: 700px;
    overflow: auto;
  }
  table {
    width: 100%;
    table-layout: fixed;
    empty-cells: show;
    border-collapse:separate;
    border-spacing:0px 10px;
  }
  thead {
    position: sticky;
    top: 10px;
  }
  thead:before{
    position: absolute;
    content: '';
    width: calc(100% + var(--shadow-blur) * 2);
    transform: translate(calc(var(--shadow-blur) * -1) , -10px);
    height: 20px;
    background-color: var(--main-color);
    z-index: -1;
  }
  table td,
  table th {
    color: var(--text-color);
    padding: 8px 16px 8px 16px;
    text-align: left;
  }
  table th {
    color: var(--text-back-color) !important;
    font-weight: 600;
    white-space: nowrap;
  }
</style>
高度/流体高度
可以为 Table 设置一个高度。(height)
当数据量动态变化时,可以为 Table 设置一个最大高度。(maxHeight) 通过设置max-height属性为 Table 指定最大高度。此时若表格所需的高度大于最大高度,则会显示一个滚动条。
只要在sanorin-table元素中定义了height或者maxHeight属性,即可实现固定表头的表格,而不需要额外的代码。
代码如下:
<script setup>
  import { ref, computed, reactive } from 'vue'
  import { useProp, useNeumorphism } from '../mixin/neumorphism'
  const props = defineProps({
      ...useProp,
      ...{
        data: { // dataList
            type: Array,
            default: () => [],
        },
        columns: { // columnsList
            type: Array,
            default: () => [],
        },
        height: {
          type: Number,
        },
        maxHeight: {
          type: Number,
        }
      }
  })
  // 高度设置
  let tableHeightStyleObj = computed(() => {
    let styleObj = ((e) => {
      if (e.maxHeight) return { maxHeight: e.maxHeight + 'px' }
      if (e.height) return { height: e.height + 'px' }
      return {}
    })({...props})
    return styleObj
  })
  const { baseStyleObject } = useNeumorphism(props)
  let styleObject =  computed(() => ({
    ...tableHeightStyleObj.value
  }))
</script>
<template>
    <div class="san-table scrollbar" :>
      <table>
        <colgroup>
            <col v-for="(col, index) in columns" :key="index">
        </colgroup>
        <thead>
            <tr class="neumorphism">
              <th v-for="col in columns" :key="col.key"> {{col.title}} </th>
            </tr>
        </thead>
        <tbody>
          <tr class="neumorphism" v-for="row in data" :key="row.id">
            <td v-for="col in columns" :key="col.key"> {{row[col.key]}} </td>
          </tr>
        </tbody>
      </table>
    </div>
</template>
<script>
  export default {
    name: 'sanorin-table',
  }
</script>
<style scoped>
  @import "../../style/index.css";
  @import "../../style/neumorphism.css";
  .san-table{
    padding: 0px 20px 20px 20px;
    position: relative;
    width: 700px;
    overflow: auto;
  }
  table {
    width: 100%;
    table-layout: fixed;
    empty-cells: show;
    border-collapse:separate;
    border-spacing:0px 10px;
  }
  thead {
    position: sticky;
    top: 10px;
  }
  thead:before{
    position: absolute;
    content: '';
    width: calc(100% + var(--shadow-blur) * 2);
    transform: translate(calc(var(--shadow-blur) * -1) , -10px);
    height: 20px;
    background-color: var(--main-color);
    z-index: -1;
  }
  table td,
  table th {
    color: var(--text-color);
    padding: 8px 16px 8px 16px;
    text-align: left;
  }
  table th {
    color: var(--text-back-color) !important;
    font-weight: 600;
    white-space: nowrap;
  }
</style>
自定义列宽
接下来加入宽度控制,希望在columns 传入的数组对象内加入宽度,示例如下:
const columnsList = [
  {
    title: '书名',
    key: 'name',
    width: 100,
  },
  {
    title: '作者',
    key: 'author',
    width: 100,
  },
  {
    title: '价格',
    key: 'price',
    width: 100,
  },
  {
    title: '简介',
    key: 'desc',
    minWidth: 350,
  }
]
希望达到以下效果
1、含有width的列,宽度固定,不随浏览器宽度变化而变化
2、含有minWidth的列,在大于设定值时,自动填充 table 剩余宽度,小于设定值时,固定该宽度
3、不包含width和minWidth的列,自动填充 table 剩余宽度
根据我们的需求,我们需要单独控制每一列的宽度展示,并在浏览器宽度变化时实时的重新计算并且重新渲染列。
首先定义出一个方法,用来计算每一列在当前情况下所要的宽度,再绑定要dom上。然后,每次表格变化/浏览器宽度变化时候就能实时响应改变Table的宽度了。
  const initColumns = () => {
    // 计算每一列在当前情况下所要的宽度
  }
  watch(() => props.columns, () => { initColumns() });
  onMounted(() => {
    nextTick(() => {
      initColumns();
      on(window, 'resize', throttle(() => initColumns(), 400));
    });
  });
  onBeforeUnmount(() => off(window, 'resize', () => initColumns()));
全部代码:
<script setup>
  import { ref, computed, watch, onMounted, onBeforeUnmount, nextTick } from 'vue'
  import { on, off } from '../../utils/listener'
  import { throttle } from "../../utils/debounce&throttle"
  import { useProp, useNeumorphism } from '../mixin/neumorphism'
  const table = ref() // 与html中ref=""对应,定位dom元素
  const props = defineProps({
      ...useProp,
      ...{
        data: { // dataList
            type: Array,
            default: () => [],
        },
        columns: { // columnsList
            type: Array,
            default: () => [],
        },
        height: { // height
          type: Number,
        },
        maxHeight: { // 流体高度
          type: Number,
        },
        minUnsetWidth: {  // 未设置宽度时最小宽度
          type: Number,
          default: 80
        }
      }
  })
  // 高度设置
  let tableHeightStyleObj = computed(() => {
    let styleObj = ((e) => {
      if (e.maxHeight) return { maxHeight: e.maxHeight + 'px' }
      if (e.height) return { height: e.height + 'px' }
      return {}
    })({...props})
    return styleObj
  })
  // 列宽设置
  let col = ref([])
  const { columns, minUnsetWidth } = props
  const _min_column_width = minUnsetWidth // 未设置宽度时最小宽度
  const initColumns = () => {
    col.value = (() => {
      let _total_width = table.value.offsetWidth  // 表格dom元素总宽度
      let _needed_minWidth = columns.reduce((t, v) => { // 需要的最小宽度
        t += v.width || v.minWidth || _min_column_width
        return t
      }, 0)
      // 需要的最小宽度比总宽度大,则取minWidth即可
      if (_needed_minWidth >= _total_width) return columns.reduce((t, v) => {
        let n = v.width || v.minWidth || _min_column_width
        t = [...t, n]
        return t
      }, [])
      // 需要的最小宽度比总宽度大,则要把minWidth加权,权重为(未分配的宽度 / minWidth之和)
      let _unassigned_width = columns.reduce((t, v) => {
        t += v.minWidth || 0
        return t
      }, 0)
      let _assigned_width = _needed_minWidth - _unassigned_width
      let _width_power = (_total_width - _assigned_width) / _unassigned_width
      return columns.reduce((t, v) => {
        let n = v.width || (v.minWidth ? (_width_power * v.minWidth).toFixed(2) : _min_column_width)
        t = [...t, n]
        return t
      }, [])
    })()
  }
  watch(() => props.columns, () => { initColumns() })
  const throttleInitColumns = () => throttle(() => initColumns(), 400)
  onMounted(() => {
    nextTick(() => {
      initColumns()
      on(window, 'resize', throttleInitColumns)
    })
  })
  onBeforeUnmount(() => off(window, 'resize', throttleInitColumns))
  const { baseStyleObject } = useNeumorphism(props)
  let styleObject =  computed(() => ({
    ...tableHeightStyleObj.value
  }))
</script>
<template>
    <div class="san-table scrollbar" :>
      <table ref="table">
        <colgroup>
            <col v-for="(item, index) in col" :key="index" :width="`${item}px`">
        </colgroup>
        <thead>
            <tr class="neumorphism">
              <th v-for="col in columns" :key="col.key"> {{col.title}} </th>
            </tr>
        </thead>
        <tbody>
          <tr class="neumorphism" v-for="row in data" :key="row.id">
            <td v-for="col in columns" :key="col.key"> {{row[col.key]}} </td>
          </tr>
        </tbody>
      </table>
    </div>
</template>
<script>
  export default {
    name: 'sanorin-table',
  }
</script>
<style scoped>
  @import "../../style/index.css";
  @import "../../style/neumorphism.css";
  .san-table{
    padding: 0px 20px 20px 20px;
    position: relative;
    overflow: auto;
  }
  table {
    width: 100%;
    table-layout: fixed;
    empty-cells: show;
    border-collapse:separate;
    border-spacing:0px 10px;
  }
  thead {
    position: sticky;
    top: 10px;
  }
  thead:before{
    position: absolute;
    content: '';
    width: calc(100% + var(--shadow-blur) * 2);
    transform: translate(calc(var(--shadow-blur) * -1) , -10px);
    height: 20px;
    background-color: var(--main-color);
    z-index: -1;
  }
  table td,
  table th {
    color: var(--text-color);
    padding: 8px 16px 8px 16px;
    text-align: left;
    word-break:break-all;
  }
  table th {
    color: var(--text-back-color) !important;
    font-weight: 600;
    white-space: nowrap;
  }
</style>
其中用到的两个js,防抖节流和注册监听这里也放下吧
/* 防抖节流函数 */
let timeout = null // 创建一个标记用来存放定时器的返回值
let count = 0;
export function debounce(fn, wait = 1000, immediate = false) {
  return function () {
    const args = arguments;
    if (immediate) {
      if (count == 0) {
        fn.apply(this, arguments)
        count++;
      } else {
        if (timeout) {
          clearTimeout(timeout) // 每当用户输入的时候把前一个 setTimeout clear 掉
        }
        timeout = setTimeout(() => {
          fn.apply(this, arguments)
        }, wait)
      }
    } else {
      if (timeout) {
        clearTimeout(timeout) // 每当用户输入的时候把前一个 setTimeout clear 掉
      }
      timeout = setTimeout(() => {
        fn.apply(this, arguments)
      }, wait)
    }
  }()
}
let canRun = true;
let count1 = 0;
export function throttle(fn, wait = 1000, immediate = true) {
  return function () {
    if (immediate) {
      if (count1 == 0) {
        fn.apply(this, arguments);
        count1++;
      } else {
        if (canRun) {
          canRun = false
          setTimeout(function () {
            fn.apply(this, arguments)
            canRun = true
          }, wait);
        }
      }
    } else {
      if (!canRun) return
      canRun = false
      setTimeout(function () {
        fn.apply(this, arguments)
        canRun = true
      }, wait);
    }
  }()
}
/**
* 绑定事件 on(element, event, handler)
*/
export const on = (element, event, handler) => {
if (document.addEventListener) {
if (element && event && handler) {
element.addEventListener(event, handler, false)
}
}
}
/**
* 解绑事件 off(element, event, handler)
*/
export const off = (element, event, handler) => {
if (document.removeEventListener) {
if (element && event) {
element.removeEventListener(event, handler, false)
}
}
} 


