
随着spring boot的流行,越来越多的开发者选择利用其快速开发和简化配置的优势,构建企业级应用。spring boot通过自动化配置和高度的模块化,使得开发者可以更快速地实现业务功能。而spring ai作为spring生态的一部分,提供了与人工智能技术结合的能力,可以帮助开发者轻松将ai能力集成到spring boot项目中。
本篇文章将引导你如何在Spring Boot中快速集成Spring AI,并通过简单的示例实现AI功能。
2. 环境准备我这里所准备的环境:
Java 17 或更高版本:Spring Boot和Spring AI都依赖于Java 17及更高版本。 Spring Boot 3.x:Spring AI支持Spring Boot 3.2.x和3.3.x。 集成的AI服务:我们将集成OpenAI的API来展示如何使用Spring AI进行智能对话,这里使用硅基流动API演示。3. 创建Spring Boot项目首先,使用Spring Initializr快速创建一个Spring Boot项目。具体创建步骤这里省略,Springboot版本选用3.2.x以上版本,这里选择3.4.2。
3.1. 添加依赖添加Springboot和Spring ai相关依赖。我们集成spring-ai-bom作为依赖版本管理,截止书写这边文章时,该以来版本为1.0.0-SNAPSHOT。
代码语言:xml复制4.0.0 org.springframework.boot spring-boot-starter-parent 3.4.2 org.example springboot-ai 0.0.1-SNAPSHOT springboot-ai springboot-ai 17 spring-milestones Spring Milestones https://repo.spring.io/milestone false spring-snapshots Spring Snapshots https://repo.spring.io/snapshot false org.springframework.boot spring-boot-starter org.springframework.boot spring-boot-starter-test test org.springframework.boot spring-boot-starter-web org.springframework.boot spring-boot-devtools runtime org.springframework.ai spring-ai-openai-spring-boot-starter org.springframework.ai spring-ai-spring-boot-autoconfigure org.springframework.ai spring-ai-bom 1.0.0-SNAPSHOT pom import org.springframework.boot spring-boot-maven-plugin
这里只需要关注两个核心依赖:
代码语言:xml复制3.2. 配置API密钥org.springframework.ai spring-ai-openai-spring-boot-starter org.springframework.ai spring-ai-spring-boot-autoconfigure
为了能够调用OpenAI API,我们需要配置一个API密钥。

在application.properties中添加API密钥配置:
代码语言:properties复制spring.application.name=springboot-ai# 硅基流动API接口,默认为openai.com地址spring.ai.openai.base-url=https://*********# 这里是openai的api密钥spring.ai.openai.api-key=sk-**************# 模型名称,这里选用deepseek-V3模型。你也可以选用Qwen或GPTspring.ai.openai.chat.options.model=deepseek-ai/DeepSeek-V3#spring.ai.openai.chat.options.responseFormat.type=json_object3.3. 编写交互类
到此,以上简单几步就已经把Springboot和Spring ai快速集成起来了。这里编写交互类,来具体调用大模型接口:
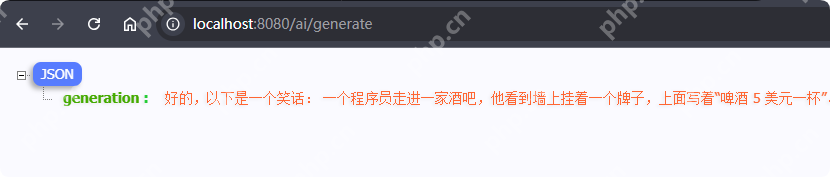
代码语言:java复制package org.example.springbootai;import org.springframework.ai.chat.messages.UserMessage;import org.springframework.ai.chat.model.ChatResponse;import org.springframework.ai.chat.prompt.Prompt;import org.springframework.ai.openai.OpenAiChatModel;import org.springframework.beans.factory.annotation.Autowired;import org.springframework.web.bind.annotation.GetMapping;import org.springframework.web.bind.annotation.RequestParam;import org.springframework.web.bind.annotation.RestController;import reactor.core.publisher.Flux;import java.util.Map;@RestControllerpublic class ChatController { private final OpenAiChatModel chatModel; @Autowired public ChatController(OpenAiChatModel chatModel) { this.chatModel = chatModel; } /** * 这里简单实现一个接口,让用户输入一个prompt,然后返回一个结果。prompt输入一个指令,让他给我们讲个笑话 * @param message * @return */ @GetMapping("/ai/generate") public Map generate(@RequestParam(value = "message", defaultValue = "讲个笑话") String message) { return Map.of("generation", this.chatModel.call(message)); }} 3.4. 创建启动类代码语言:java复制@SpringBootApplicationpublic class AiApplication { public static void main(String[] args) { SpringApplication.run(AiApplication.class, args); }}3.5 测试与运行到此,Springboot和Spring ai的集成已经结束了。我们运行AiApplication后,访问地址:http://localhost:8080/ai/generate。可以看到浏览器成功返回了大模型基于我们的prompt返回的文本内容:
本篇文章,我们展示了如何在Spring Boot项目中快速集成Spring AI,并结合OpenAI API构建一个简单的智能对话系统。通过几步简单的配置和代码实现,开发者可以快速将AI能力集成到现有的Spring Boot项目中。