该内容介绍了基于BiSeNet的脸部解析项目。项目使用简单,需输入正方形图片(会resize为523x512),适用于妆容迁移等任务。提供了原PyTorch项目地址,说明权重由PyTorch转Paddle的情况。介绍了输入输出路径,重点提及需RGB三通道图片。还给出了相关代码,包括解析可视化、图片判断、模型评估等函数,以及运行结果示例。
☞☞☞AI 智能聊天, 问答助手, AI 智能搜索, 免费无限量使用 DeepSeek R1 模型☜☜☜

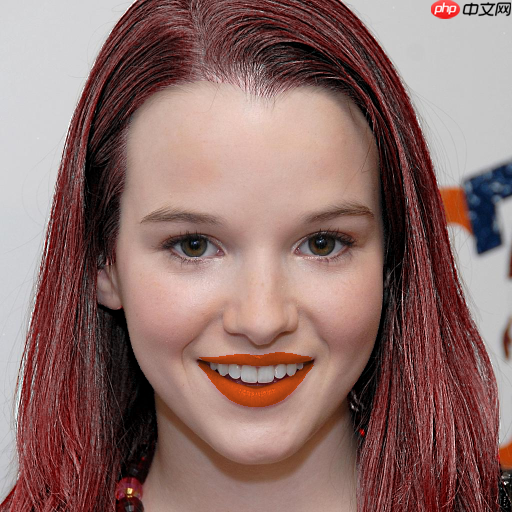
本项目使用极其简单,就是你需要脸部解析的图片尽量是一个正方形,因为数据预处理会先把图片resize成为523x512大小。
另外本项目适合为妆容迁移等脸部任务提供脸部各个部位的辅助信息,作为一个轮子是很好的。
原pytorch项目地址:https://github.com/zllrunning/face-parsing.PyTorch
权重pytorch 转paddle,感谢张牙舞爪帮我转的权重,我也不知道我为啥转错了,有点尴尬。
把需要人脸解析的图片放在myphoto文件夹下 举个例子./myphoto/1.jpg
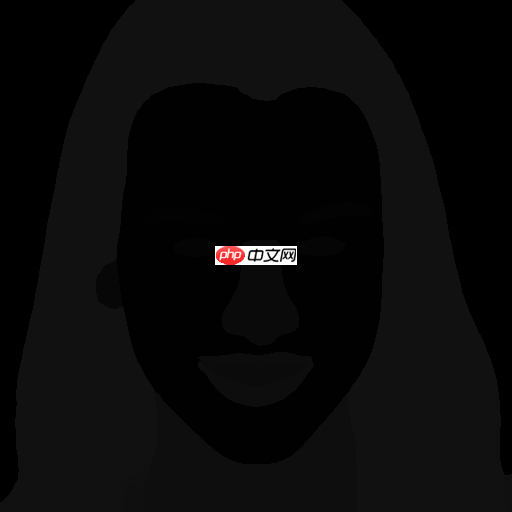
生成的人脸解析图片会放在test_res文件夹下
./test_res/1.png 这张图片就是SSAT妆容迁移需要输入的人脸解析的信息了
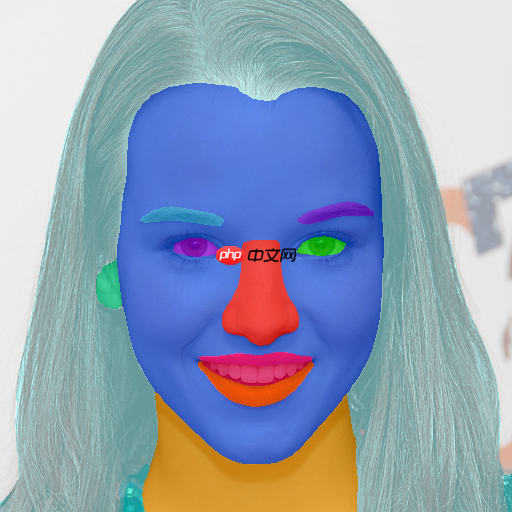
./test_res/1color.png 这张图片就是为了方便直观看是否人脸解析正确罢了
当把需要解析的人脸照片放在./myphoto文件夹下后就请傻瓜式允许下方代码就行!只要你的图片是RGB三通道的就行,RGBA四通道需要自己调试
from paddle_model import BiSeNetimport paddleimport osimport os.path as ospimport numpy as npfrom PIL import Imageimport paddle.vision.transforms as transformsimport cv2def vis_parsing_maps(im, parsing_anno, stride, save_im=False, save_path='vis_results/parsing_map_on_im.jpg'):
    # Colors for all 20 parts
    part_colors = [[255, 0, 0], [255, 85, 0], [255, 170, 0],
                   [255, 0, 85], [255, 0, 170],
                   [0, 255, 0], [85, 255, 0], [170, 255, 0],
                   [0, 255, 85], [0, 255, 170],
                   [0, 0, 255], [85, 0, 255], [170, 0, 255],
                   [0, 85, 255], [0, 170, 255],
                   [255, 255, 0], [255, 255, 85], [255, 255, 170],
                   [255, 0, 255], [255, 85, 255], [255, 170, 255],
                   [0, 255, 255], [85, 255, 255], [170, 255, 255]]

    im = np.array(im)
    vis_im = im.copy().astype(np.uint8)
    vis_parsing_anno = parsing_anno.copy().astype(np.uint8)
    vis_parsing_anno = cv2.resize(vis_parsing_anno, None, fx=stride, fy=stride, interpolation=cv2.INTER_NEAREST)
    vis_parsing_anno_color = np.zeros((vis_parsing_anno.shape[0], vis_parsing_anno.shape[1], 3)) + 255

    num_of_class = np.max(vis_parsing_anno)    for pi in range(1, num_of_class + 1):
        index = np.where(vis_parsing_anno == pi)
        vis_parsing_anno_color[index[0], index[1], :] = part_colors[pi]

    vis_parsing_anno_color = vis_parsing_anno_color.astype(np.uint8)    # print(vis_parsing_anno_color.shape, vis_im.shape)
    vis_im = cv2.addWeighted(cv2.cvtColor(vis_im, cv2.COLOR_RGB2BGR), 0.4, vis_parsing_anno_color, 0.6, 0)    # Save result or not
    if save_im:
        cv2.imwrite(save_path[:-4] +'.png', vis_parsing_anno)
        cv2.imwrite(save_path[:-4]+"color.png", vis_im, [int(cv2.IMWRITE_JPEG_QUALITY), 100])    # return vis_imIMG_EXTENSIONS = [    '.jpg', '.JPG', '.jpeg', '.JPEG',    '.png', '.PNG', '.ppm', '.PPM', '.bmp', '.BMP',
]def is_image_file(filename):
    return any(filename.endswith(extension) for extension in IMG_EXTENSIONS)def evaluate(respth='./test_res', dspth='./data', save_pth='paddleweight1.pdparams'):
    '''
    respth 测试图片模型输出的文件夹路径位置
    dspth 模型读取图片的文件夹路径位置
    save_pth 加载模型权重路径
    '''

    if not os.path.exists(respth):
        os.makedirs(respth)

    n_classes = 19
    net = BiSeNet(n_classes=n_classes)
    net.set_state_dict(paddle.load(save_pth))
    net.eval()

    to_tensor = transforms.Compose([
        transforms.ToTensor(),
        transforms.Normalize((0.485, 0.456, 0.406), (0.229, 0.224, 0.225)),
    ])    with paddle.no_grad():        for image_path in os.listdir(dspth):            if is_image_file(image_path):
                img = Image.open(osp.join(dspth, image_path))
                image = img.resize((512, 512), Image.BILINEAR)                # image = image[:,:,:3]
                img = to_tensor(image)
                img = paddle.unsqueeze(img, 0)                # img = img.cuda()
                out = net(img)[0]
                parsing = out.squeeze(0).numpy().argmax(0)                # print(parsing)
                print(np.unique(parsing))

                vis_parsing_maps(image, parsing, stride=1, save_im=True, save_path=osp.join(respth, image_path))if __name__ == "__main__":
evaluate(dspth='./myphoto')[ 0 1 2 3 4 5 10 12 13 14 16 17] [ 0 1 2 3 4 5 10 12 13 14 17] [ 0 1 2 3 7 10 12 13 14 16 17] [ 0 1 2 3 4 5 10 12 13 14 16 17 18]
以上就是BiSeNet脸部解析,并且可以进行可视化脸部哦的详细内容,更多请关注php中文网其它相关文章!

每个人都需要一台速度更快、更稳定的 PC。随着时间的推移,垃圾文件、旧注册表数据和不必要的后台进程会占用资源并降低性能。幸运的是,许多工具可以让 Windows 保持平稳运行。

 广告
广告Copyright 2014-2025 https://www.php.cn/ All Rights Reserved | php.cn | 湘ICP备2023035733号


 811
811